Codex Deployment Guide
Install OpenAI's Codex CLI, connect it to JZS Token with CC Switch or by hand, and start coding.
What you need
https://jzstoken.com/api/v1/api/v1. Codex appends /responses.| Field | Value | Notes |
|---|---|---|
| Base URL | https://jzstoken.com/api/v1 | Keep /api/v1. Codex appends /responses. |
| API Key | sk-… | From API Keys. |
| Model | gpt-5.6-terra | Or any ID from the live catalog. IDs are case-sensitive. |
| Node.js | 18 or newer | Codex installs through npm. Download. |
Install Codex first, whichever setup you choose:
npm install -g @openai/codex@latest
codex --version
Linux may need sudo. On Windows, run the terminal as administrator.
Set up with CC Switch (recommended)
CC Switch writes ~/.codex/config.toml for you and lets you switch providers with one click.
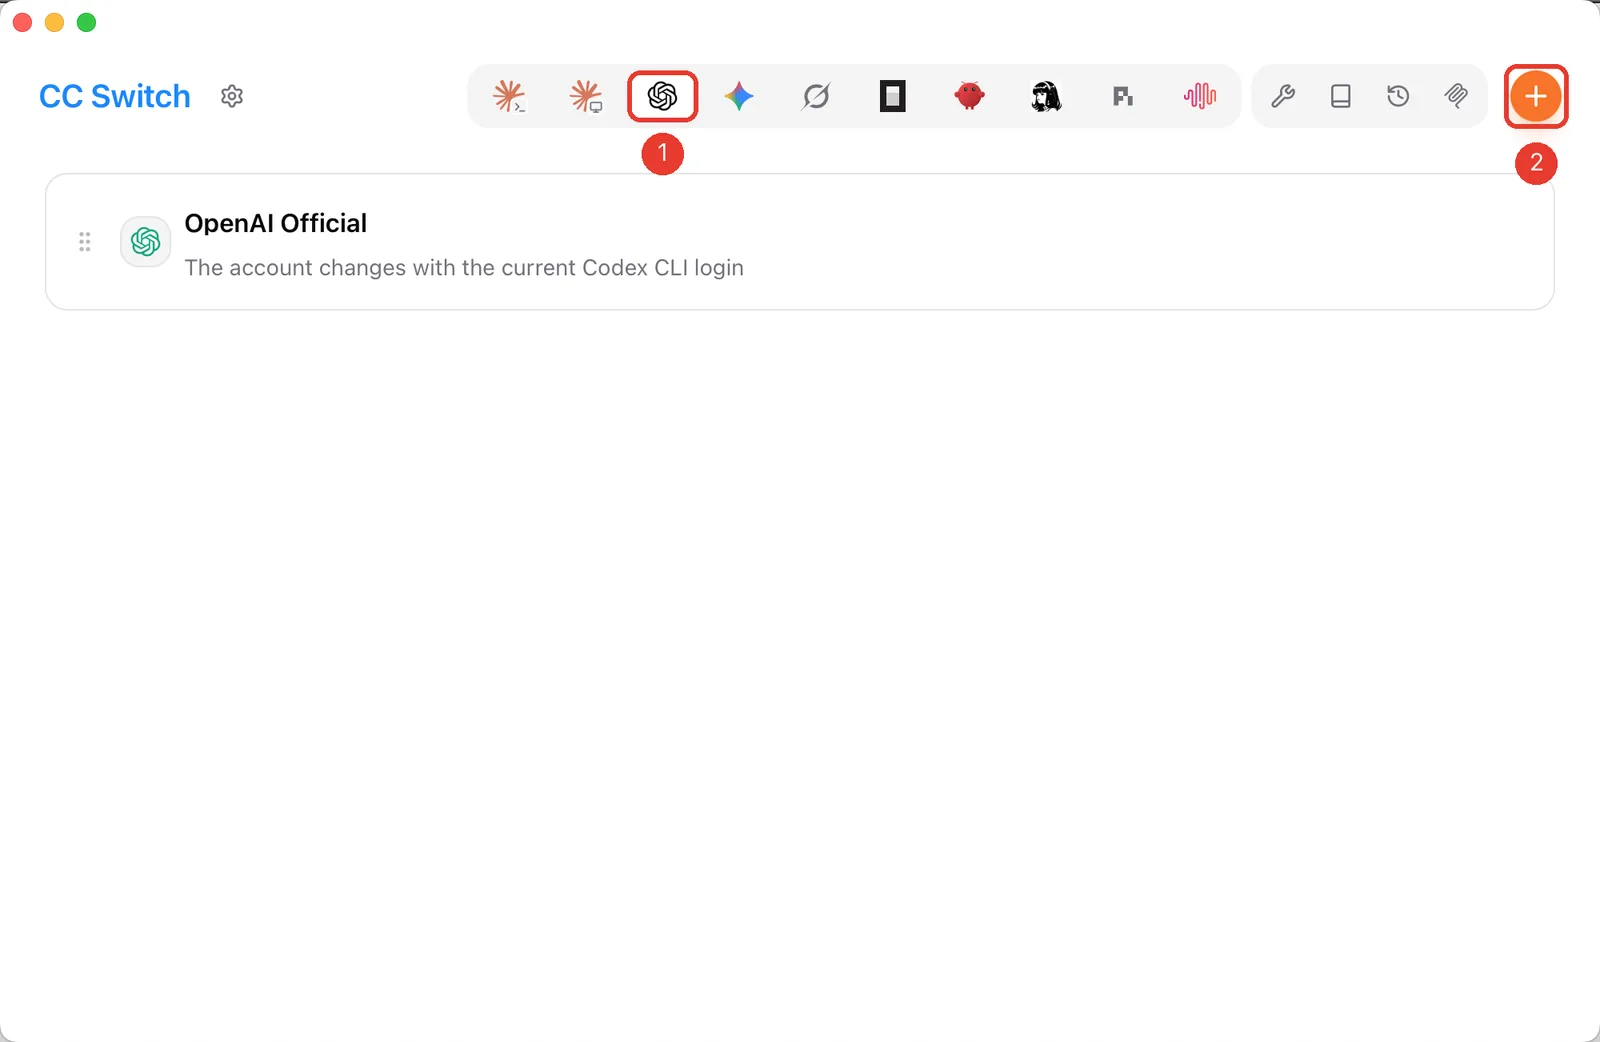
1. Open the Codex tab and click +
Select the OpenAI icon in the top bar (1), then click the orange + (2).
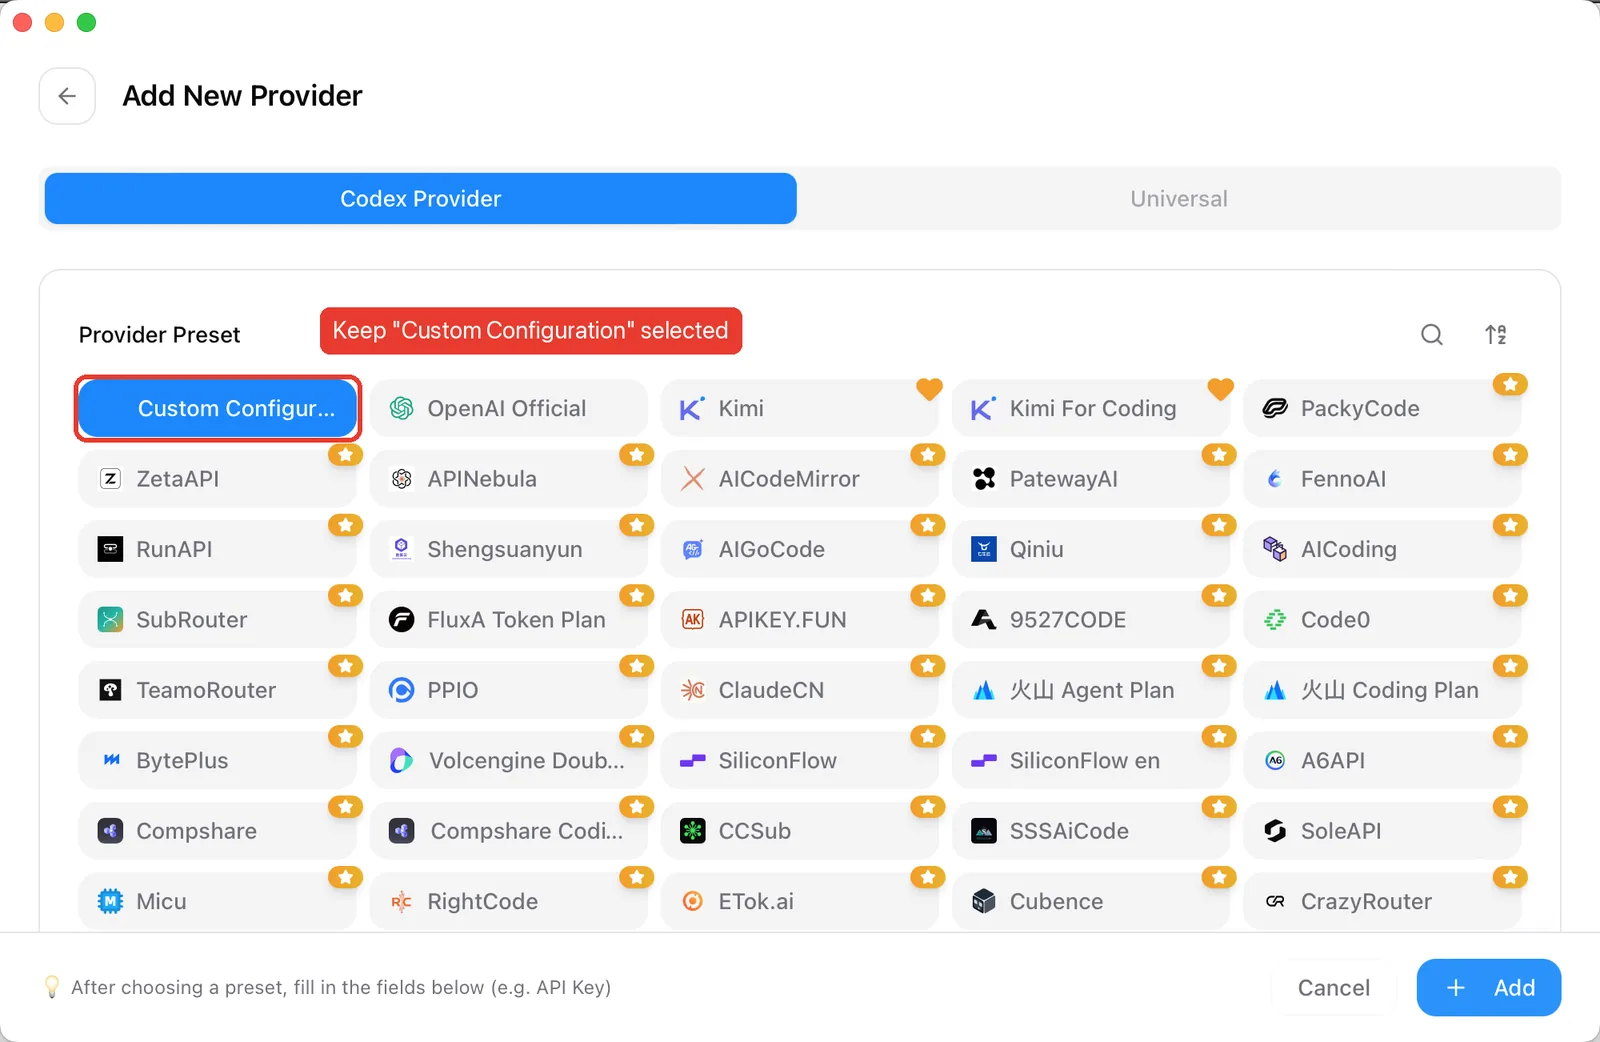
2. Keep "Custom Configuration"
On the Codex Provider tab, leave Custom Configuration selected and scroll down to the form.
3. Fill in the form
Enter a Provider Name such as JZS Token, then:
- API Key: paste your key.
- API Request URL:
https://jzstoken.com/api/v1. It must end with/v1; leave Full URL off. - Default Model:
gpt-5.6-terra, or any model from the catalog.
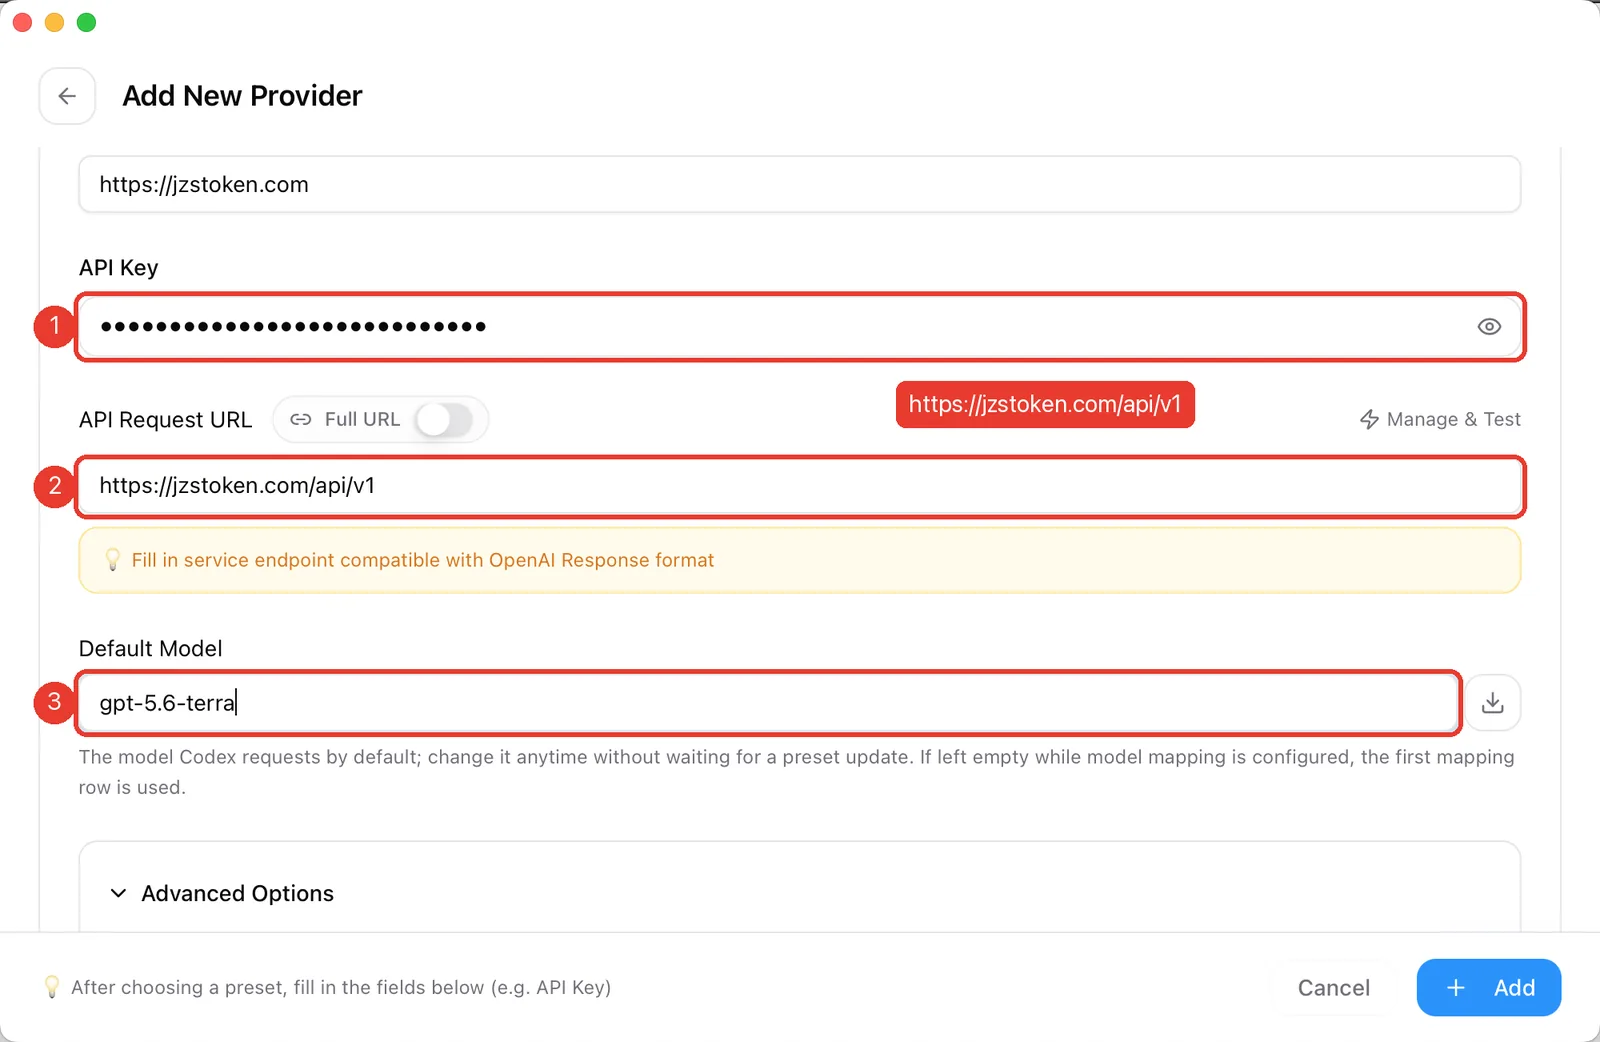
Click Add.
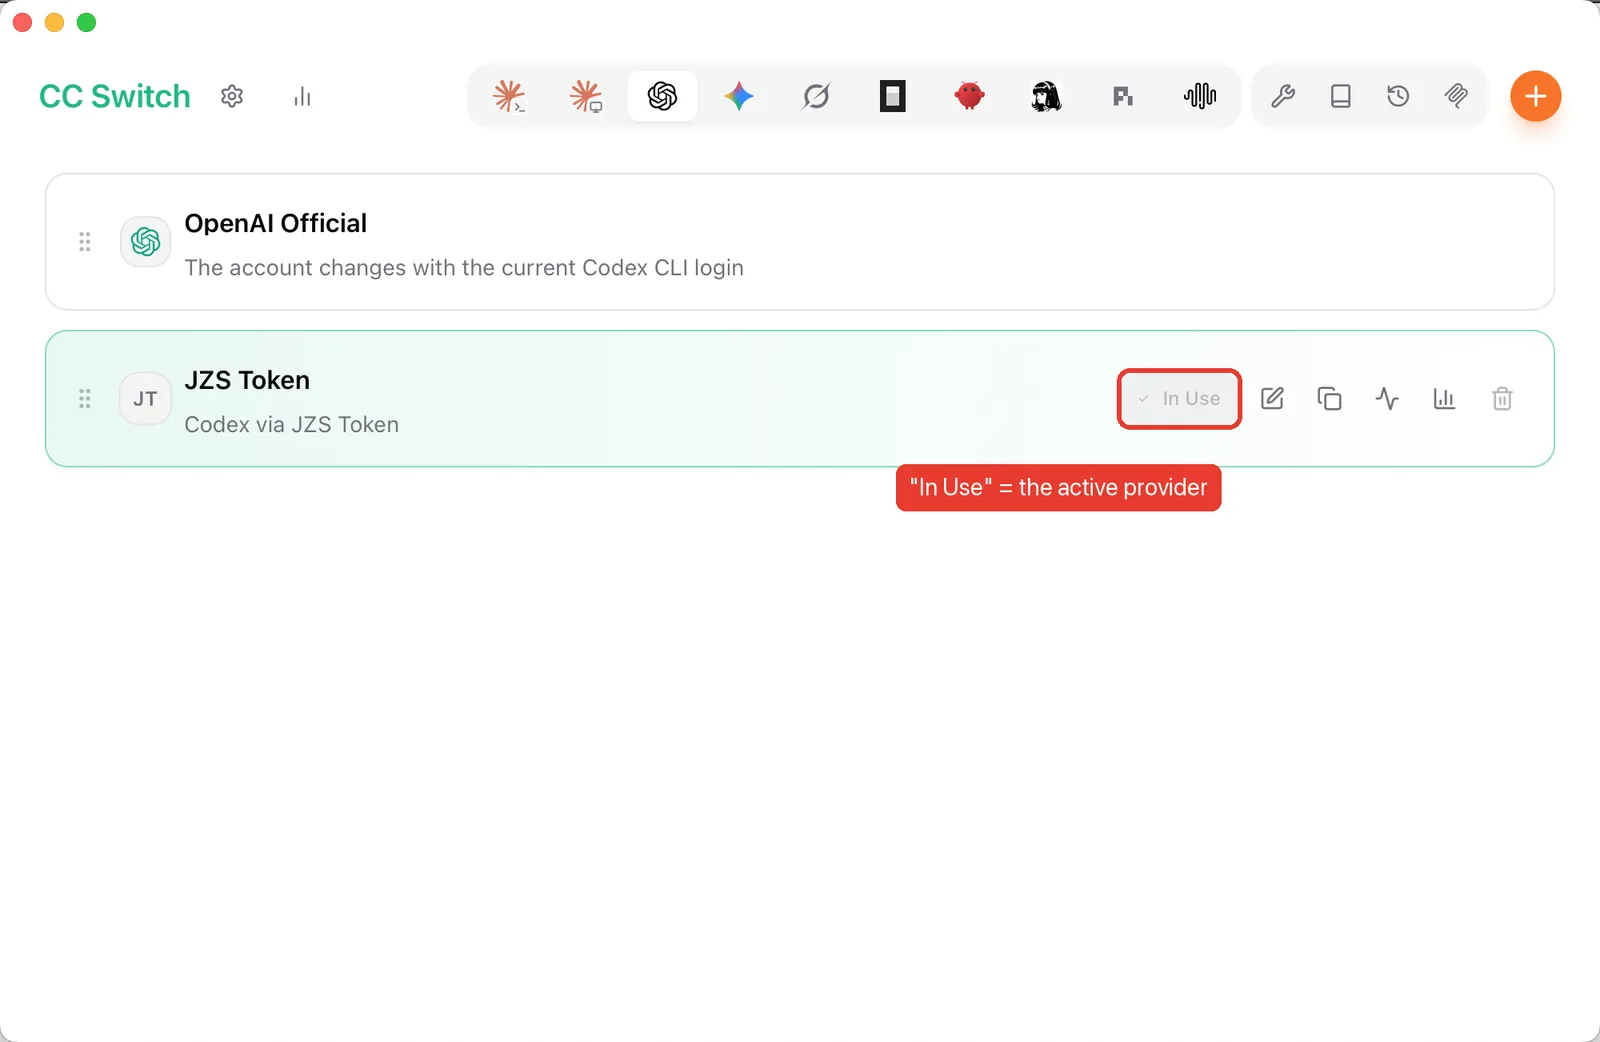
4. Check that it is in use
The new card is highlighted and its button reads In Use. If another provider is active, hover over the JZS Token card and click Enable.
5. Start Codex
Open a terminal in your project folder and run codex. The header shows the model from your CC Switch provider.
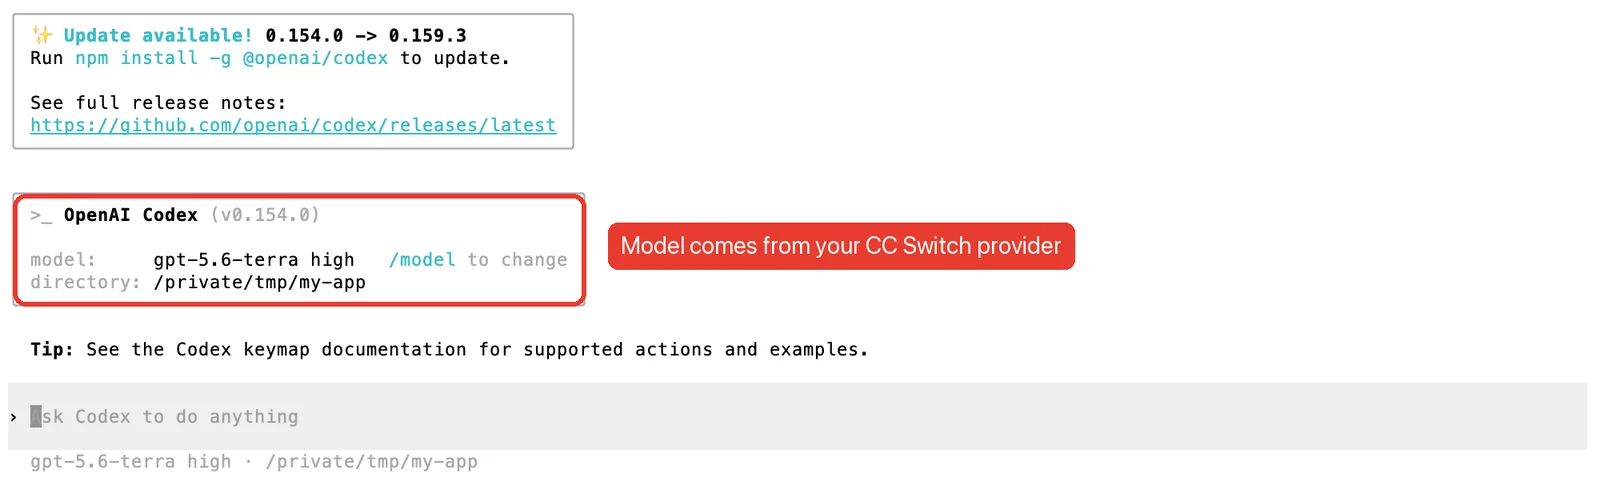
config.toml when it starts.Configured, but the chat never replies?
- The request URL is exactly
https://jzstoken.com/api/v1:https, with/api/v1and no trailing slash. - The model ID matches the catalog exactly.
- Your key is active and your balance is above zero.
- No
OPENAI_BASE_URLorOPENAI_API_KEYenvironment variable overrides the config.
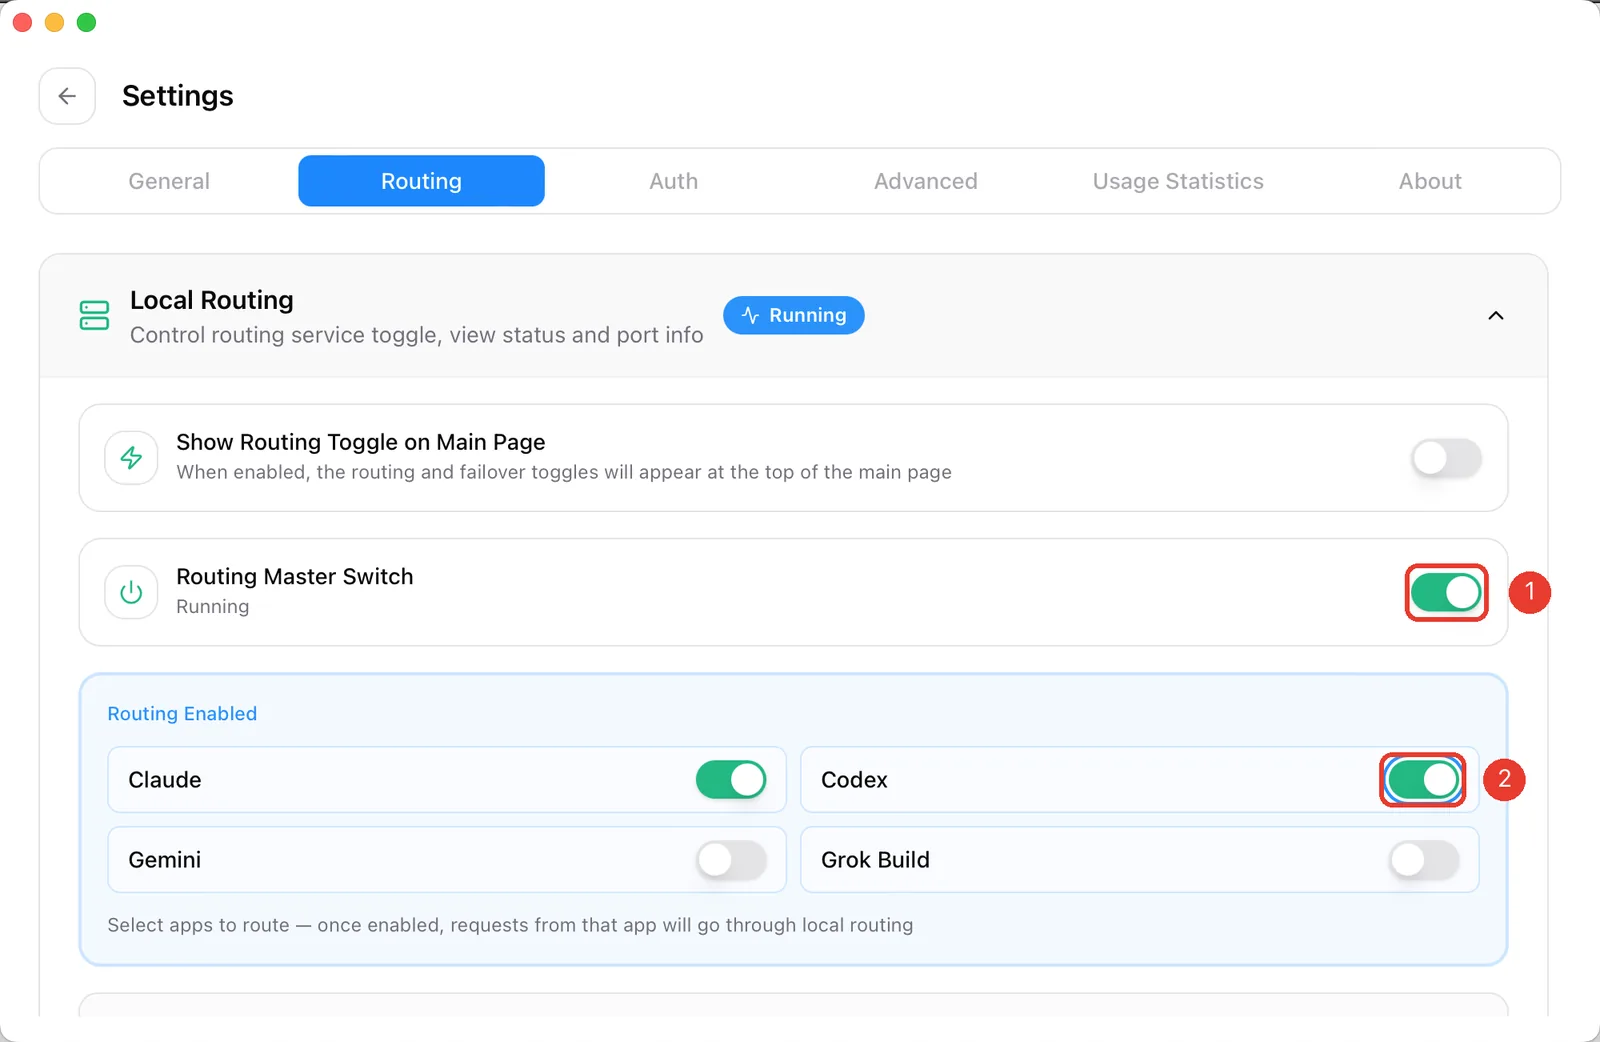
If it still hangs, route Codex through CC Switch: Settings → Routing → Local Routing, switch on Routing Master Switch (1), then Codex under Routing Enabled (2). Start a new Codex session afterwards.
Manual setup
Without CC Switch, Codex needs two files in its config folder:
%USERPROFILE%\.codex\~/.codex/mkdir -p ~/.codex| OS | Folder | Notes |
|---|---|---|
| Windows | %USERPROFILE%\.codex\ | Create the folder if it does not exist. |
| macOS / Linux | ~/.codex/ | mkdir -p ~/.codex |
config.toml
model_provider = "jzstoken"
model = "gpt-5.6-terra"
model_reasoning_effort = "high"
disable_response_storage = true

[model_providers.jzstoken]
name = "JZS Token"
base_url = "https://jzstoken.com/api/v1"
wire_api = "responses"
requires_openai_auth = true
auth.json
{
  "OPENAI_API_KEY": "sk-your-key-here"
}
On macOS or Linux you can create both from the terminal:
mkdir -p ~/.codex && cd ~/.codex
cat > config.toml << 'EOF'
model_provider = "jzstoken"
model = "gpt-5.6-terra"
model_reasoning_effort = "high"
disable_response_storage = true

[model_providers.jzstoken]
name = "JZS Token"
base_url = "https://jzstoken.com/api/v1"
wire_api = "responses"
requires_openai_auth = true
EOF
cat > auth.json << 'EOF'
{
  "OPENAI_API_KEY": "sk-your-key-here"
}
EOF
Then start Codex in a project folder:
mkdir my-codex-project
cd my-codex-project
codex
wire_api = "responses" matters: Codex talks to the Responses API. If you see 404s, check this line and that base_url ends with /api/v1.Troubleshooting
- 401:
auth.jsonis missing, or the key in it is wrong. With CC Switch, re-paste the key in the provider form. - 404:
base_urlis missing/api/v1, orwire_apiis notresponses. - 402: your balance is too low. Add credits.
- 403 model not supported: your key type does not cover that model. See the model catalog.
- Still stuck: contact support with a screenshot of the error (hide your key).